Good afternoon fans! Well, I hope there are some fans out there eventually. As of this posting, no one even knows I'm here... That will change soon.
I'm going to start with the current Watchin' God story: toilets and sinks
My husband and I bought an old 1966 Rollo Townhome trailer because we would be able to pay it off before he retires in 4 or 5 years. (And that's 'trailer', not 'mobile home': in 1966 they were 'trailers'.) When I decided to see how much it would cost to replace the standard water heater with an on-demand water heater the fun began.
It was determined that the old tank wasn't grounded properly and also may have had water leaking from a pipe directly into the wiring. Maybe. But the guy wanted to sell me a new water heater, so who knows. It's a given that it wasn't grounded. So out it came. Should have been an easy thing to replace it with a smaller, shorter version so I could use the space above the tank for more storage.
'Should have been'. Do those words strike fear into your heart?
Before the new heater could be installed, the contractor insisted that we fix the wiring - which would require an electrician if my husband didn't want to do it himself. I don't mind wiring outlets, but getting into the service panel - not up my alley. But first things first. Let's get the old heater out.
Before the old heater could be removed, the contractor insisted I remove part of the closet wall so there would be a reasonable amount of access. .... give me a break! How many water heaters do you suppose have been installed in that spot in the last 45 years?? Since the lowboy I wanted to put in would require that work anyway, I contemplated how to remove a section of the wall. And discovered that the floor was very soft in front of the heater.
God seems to have a list of things I'll need, and he drops them in my lap at the right time. Under the trailer, an unknown previous owner left a few pieces of plywood that would be just the right size to lay in front of the water heater so the gorilla who came to remove it wouldn't fall through the floor. I took down a 2' section of wall beside the closet door. That made a nice size opening to remove the water heater.
When the gorilla came and went, this was what I saw:
Dollar signs floated in front of my eyes for days. Especially when the contractors came to offer bids. We decided to do the work ourselves. Are you cringing yet???
I drew up a floor plan of how I wanted to utilize the space. Didn't follow it exactly, but mostly. I know a bit about building, but think I know more than I actually do, to be certain. God was the technical advisor and extra hand more times than I can count. Thanks Lord!
The closet on the top left didn't turn out that way because I couldn't remove the wall between the existing doors.
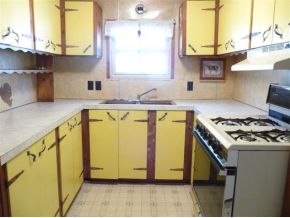
Here is what the bathroom looked like in the beginning:
I
did try to mitigate the ugly 6' countertop with some contact paper. It
was beautiful, but... the sink was rusted out, so we didn't even reuse
it. And what a waste of space - only one sink in the middle, and no storage underneath, as there was a long drain pipe that goes through the wall at the end of the counter, and a heat duct. Where the yellow wicker shelf is on the bottom right is a 24"x30" space for a washer - not deep enough to do any good, and if a washer were there the door wouldn't open all the way. That door to the left of the shower was access to the water heater
and shut-off valves.
The plan was to move the sink to the area designated for the washer, and bump the original sink area 12" into the (already too small) bedroom and put the laundry area and a closet in that 6' space.
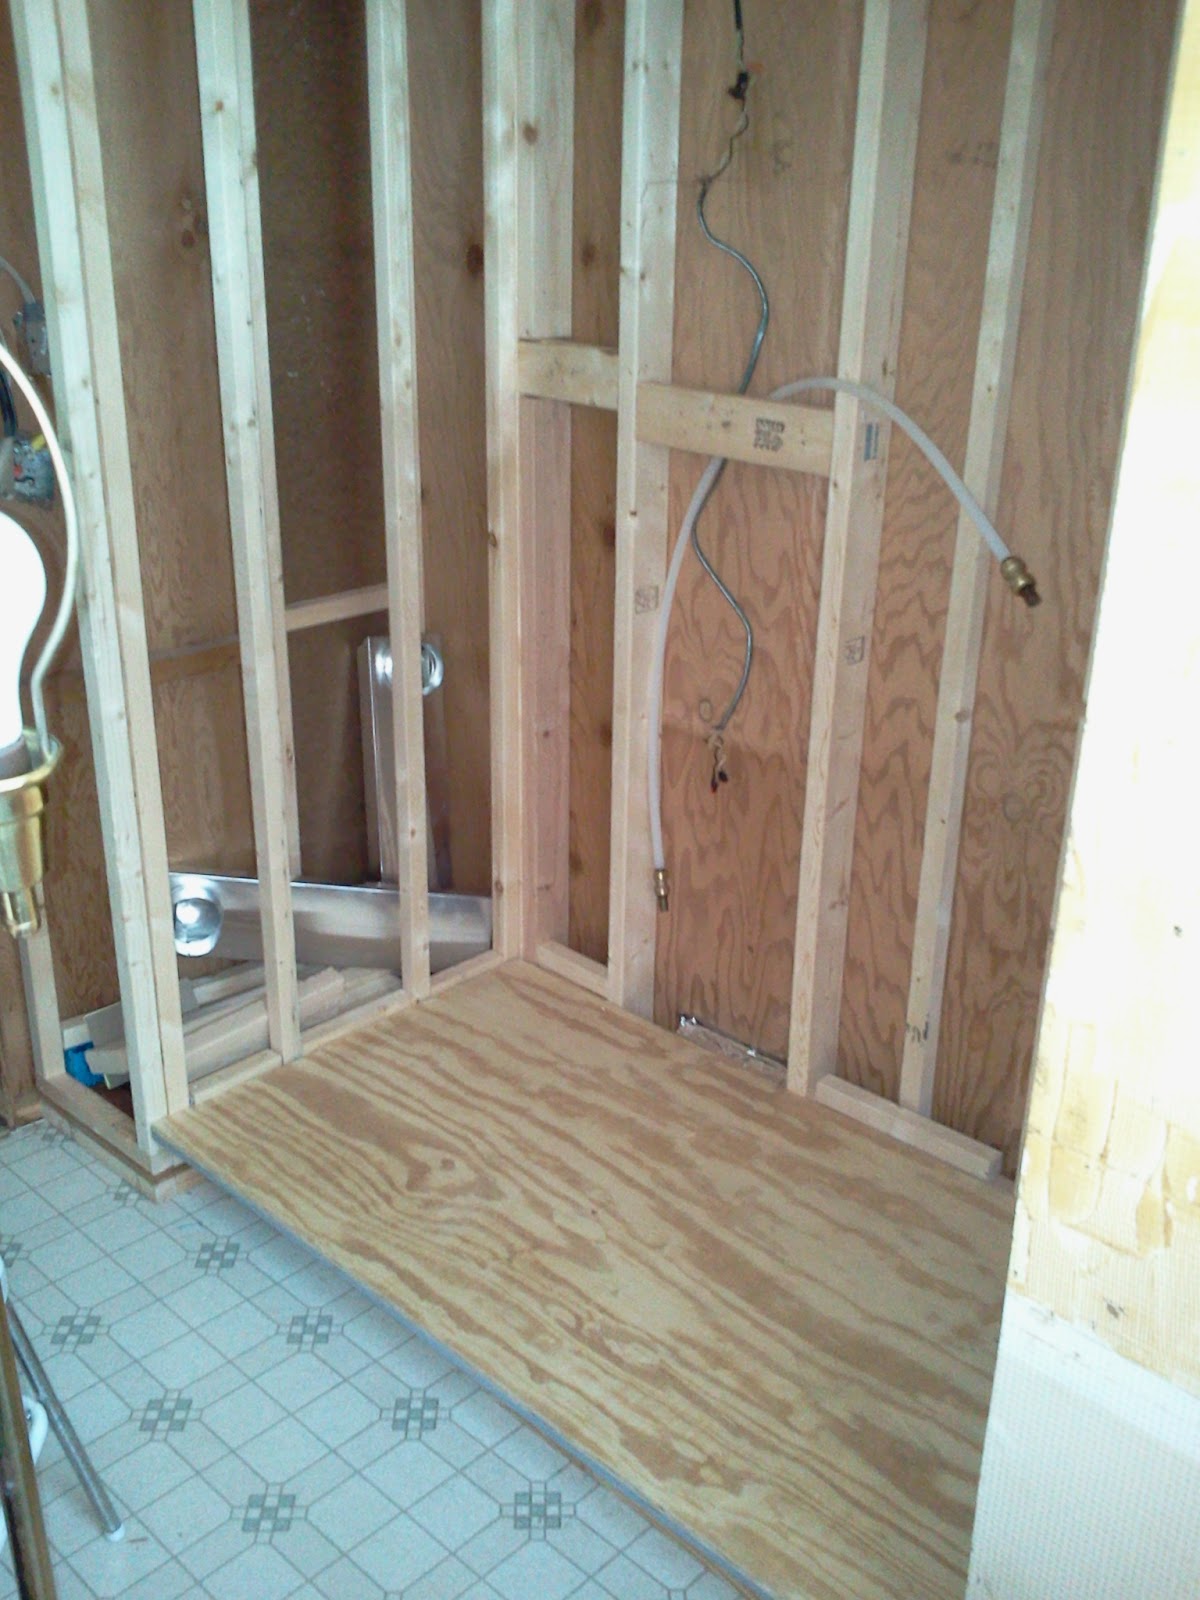
The first project would be to fix the floor. That would require removing 3 other walls and the tub.
With all the drafts, I knew there was a hole in the floor somewhere!
This is how much floor had to be removed. Under the tub, water heater and 2 feet into the closet.
This is the wall the vanity was on, from the bedroom side. Notice the wiring for the light fixture! And the 'studs' are 1"x2" - laid flat! So, the wall was 3/4" thick, plus (real) wood paneling that gave me more than one splinter as it was being removed gently, so as to be able to reuse it if necessary.
Now for the repairs... When will it ever end???
First the floor
The wall separting the bedroom and bath. It was almost perfectly
plumb. Almost. That bothered me some at that point in the project,
being a perfectionist who has come to realize that frequently 'almost'
is good enough.
The extra 2x2 is because the wood paneling didn't fit the studs. PPP. Notice the long wall on the left butts up against the plumbing wall. On the other side of the plumbing wall there is a 6" wall that encloses the water heater closet just a bit. I totally messed up on the sequences of building the wall. The plumbing wall should have butted up to the long wall, which should have gone the full length. However, that turned out to be a blessing later, because the water heater was a bit too large to go through the space, and I had to remove that 6" wall! God was watchin' out for me, even in my sloppy planning!
We paid a plumber to run new pex water lines, and do this plumbing. Another thing I wasn't up for, and Paul wasn't feeling brave about the pex just yet. (He finished the job with the water heater later, though. I love my husband!)
Tub back in. Would that it were as easy as that. Suffice it to say we learned a few things with the help of Al and a few off hand comments by other people.
Tub surround. An exercise in precise measurements - not something I'm noted for.
Sealed the window with foil tape. Hope it lasts for a while. The original method of covering the window was simply a framed screen. I'm sure that contributed to the water damage, since the water from the shower would drain right down inside the walls - for 45 years!
Paneling and the shower tree (you know, the pipe behind the wall that has all the plumbing for the water.) Picked up this shower kit for $40 on sale at Home Depot. God just sends us the right stuff at the right time! The original price was almost $200.
The closet in the bathroom to the left of the laundry area. (Remember, there was 6 feet of counter and I only need 57" for the laundry area.) Notice the
toy tool my husband let me purchase when we got started on this project - after we did the floor patch with a drill. Actually, that's why we got the compressor, because I was not going to be a happy camper doing this whole project with a drill and hammer.
Paul spent a lot of time designing and rebuilding the heat vent that necessitated raising the floor for the laundry area. And then I forgot to take a picture of it in my excitement to be able to put the platform up. Suffice it to say it was good.

Platform walls painted (with $2 mistint paint from Lowe's) and 3 shower rods in place. The one against the wall is for a shower curtain to cover the non-waterproof window. The middle one is for hanging wet clothing (definitely have to screw that one into the wall.)
After this I didn't take as many pictures. The closet has 4 shelves and is divided: it didn't seem logical to have a 12" wide x 36" deep closet. It now opens from the bathroom and the hallway.
As I was trying to put that 6" wall back up after cutting the paneling so it could be removeable (against the eventuality of having to replace the water heater) one thing lead to another, and a 50 amp breaker fell off the service box and landed on a full can of spray foam... You know what silly string looks like? uh-huh...
On the plus side, Paul asked me what we could do with all that stuff, and several brilliant ideas came to mind, the best of which is to use it in concrete stone walkway molds to make a stone face for the shed we need. You know, kinda like the heavy carving on buildings that is really plaster? As with plaster, you have to paint the foam, but I've seen it sprayed all over trailers in Alaska, so it stands a decent chance of being suitable for what I have in mind.
Okay, back to the reno...
On a trip around town looking for good junk, we saw an end table, minus one leg. It had good bones, so I picked it up. Another trip netted the brown dining table legs. Put the two of them together, painted it with a chalk paint recipe I found at
I Heart Nap Time (
here) and a $10 gallon mistint from Lowe's (I love that place, and they know us by name and project!) and used a colored poly (wiped off) on the top and 3 coats of clear on the top and the legs. Cut out the hole for the new sink. Didn't take pictures. Dropped the cutout on my foot. Didn't say bad words (nor even think them, contrary to what some people will think.)
And here it is now.
Closet: double rod on one left; high single rod in center with a shelf above and space for a short shelf below. Pegboard for accessories. Only 6' of closet space, but at least it's accessible. The closet depth is only 22", so you would only be able to see that's directly in front of the door. I opted to trade visibility for overall space. Keeps me from collecting too many clothes.
I'll take a picture of the water heater area with storage later.
And here's the bathroom.


A new sticky-vinyl floor in the bargin. The vanity is only dry-fitted right now, and there is a gouge that I put in the top by being stupid with a circular saw, but it's getting there. We have a second half-bath, so this isn't a rush project now. The hole in the wall to the right of the vanity is the back of another hall closet that's too deep. We plan to make shelves facing the bathroom, thereby getting two storage spaces for the price of one. The trim work has yet to be finished. One thing at a time. The bathroom is put back together and we have a shower and laundry! What more can one ask??
Paul put in the water heater and we had two retired contractor/handymen come to do the electrical service work and the dryer vent, because the vent had to be cut through the outside wall.
We'll go visit our favorite old-door junk man for a vintage door, as the one in place now is falling apart. Besides, it will give some good character to the hallway.
The really good story is in the fixtures. The original sink was rusted out, so we didn't reuse that. The original 'melted ice cream' tub (so Behr calls the color) was in good shape and replacing it with a shower would have cost about $600 (plus shipping!) at
Mobile Home Parts Store, since it's a special order. The toilet that was in place was white, and the hexagon vanity seen above is Kohler beige of some specific shade. In the process of redoing the floor I wanted to replace the toilet with one to match the color of the sink. So I got on craigslist and found one immediately! Thanks Lord!
We picked up the sink, complete with faucet, at our local Habitat for Humanity ReStore for $25. The new price of just the faucet is roughly $900!! Haven't priced the sink. The toilet cost us $50, don't know how much it is new, but a whole lot more than what we paid. It's also Kohler, and the tank is insulated. It flushes so quietly that I wouldn't hesitate to flush it in the middle of the night right beside the bedroom! Never knew a toilet could flush quietly!
I'm not sure how much this whole project cost. The plumber was $800, removing the water heater was $175, the two guys who did the last major bits charged $320. Lowe's.... I'd be afraid to add it up! But that included a lot of supplies and toys tools. If you add up the price of the fixtures it would certainly be over $1500, closer to $2000 says the cashier at Lowe's, and then look at the $75 we paid, well...
This project definitely made me say 'It's so much fun watchin' God!'


